


To build an AI voice assistant, you combine speech recognition to convert audio to text, Natural Language Processing (NLP) to understand intent, core programming logic to execute actions, and Text-to-Speech (TTS) to generate spoken responses. This guide provides a practical, step-by-step approach for beginners, focusing on readily available tools and APIs.
The Allure of AI Voice Assistants
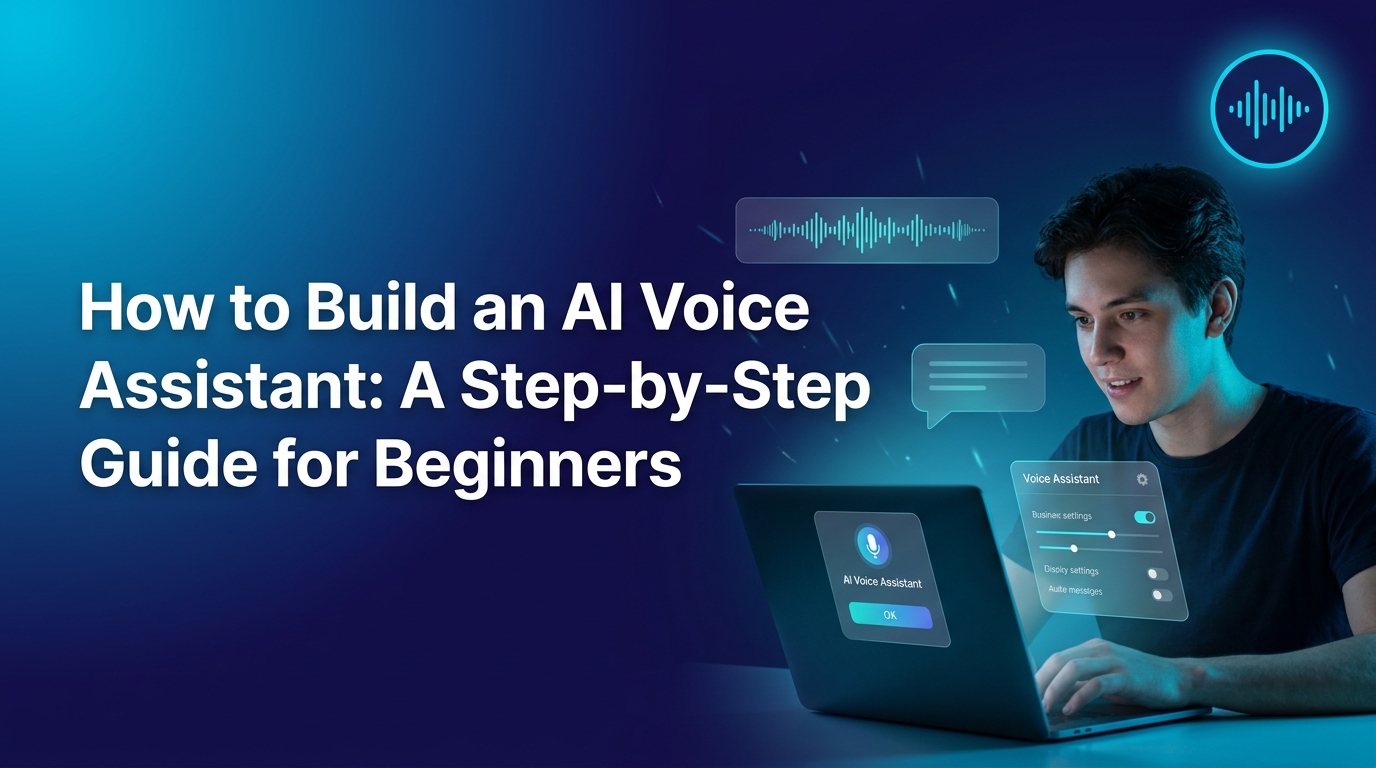
Imagine asking your computer a question and getting an audible, intelligent response, just like interacting with Siri, Alexa, or Google Assistant. These AI voice agents have seamlessly integrated into our daily lives, making technology more accessible and intuitive. If you've ever wondered how this magic works and wished to recreate it, you're in the right place. In this guide, you’ll learn how to build an AI voice assistant from scratch, following a practical, step-by-step AI assistant guide that you can code along with.
Building a functional voice assistant involves several interconnected technologies. You'll work with speech-to-text to transcribe your voice into text, Natural Language Processing (NLP) to understand your intent, and core logic for action execution – the true "brain" of your AI voice assistant programming. Finally, text-to-speech (TTS) will allow your assistant to respond verbally. This tutorial provides an AI speech recognition tutorial component, covers NLP for voice assistants, and highlights some of the best tools for AI voice assistant development. By the end, you'll have a simple, functional AI assistant running on your personal computer.
What is an AI Voice Assistant?
An AI voice assistant is a software agent designed to interact with users through spoken language. It listens to your commands, processes them, and responds audibly. Understanding this fundamental pipeline is the crucial first step to learning how to build an AI voice assistant.
Here's a high-level overview of the typical architecture and operational flow:
* User Speaks: You vocalize a command or question into a microphone.
* Audio Capture: The computer captures this spoken audio as a digital signal.
* Speech Recognition (Speech-to-Text): A specialized service or API converts the raw audio into written text.
* Natural Language Processing (NLP): This module analyzes the transcribed text to understand your intent (e.g., "gettime," "playmusic") and extracts any relevant entities (e.g., "in London," "tomorrow").
* Core Logic: This is the heart of the AI voice assistant programming. Custom code maps the identified intents to specific functions or external APIs. For example, "get_time" might call a system time function, while "open Google" would execute a command to launch a web browser.
* Response Generation: Based on the executed action, a textual response is formulated.
* Text-to-Speech (TTS): The text response is converted back into audible speech, allowing the assistant to "talk back" to you.
For the scope of this step-by-step AI assistant guide, we will focus on building a push-to-talk desktop prototype. This means the assistant will only listen when you manually trigger it, simplifying the development process compared to "always-on" wake-word systems like "Hey Siri." We'll also primarily utilize cloud-based recognition and NLP for their accessibility and powerful capabilities. Many companies, such as VocalLabs.AI, specialize in building advanced AI voice agents that go beyond simple commands, offering sophisticated multi-turn conversations and human-like interactions.
Core Components in Detail
Building an AI voice assistant requires proficiency in several core technological areas. Each component plays a vital role in enabling seamless voice interaction.
Speech Recognition (AI Speech Recognition Tutorial)
Speech Recognition, also known as Automatic Speech Recognition (ASR), is the indispensable first step in any voice assistant. It's the process of converting spoken audio into machine-readable text, relying on sophisticated acoustic and language models. When you learn how to build an AI voice assistant, mastering speech recognition is paramount.
The typical architecture for ASR involves several stages: audio is broken into small frames, then features like Mel-frequency cepstral coefficients (MFCCs) are extracted. These features are fed into advanced neural networks, such as encoder-decoder or transformer models, which predict character or word probabilities and ultimately assemble them into text. For our AI speech recognition tutorial, we won't build ASR from scratch; instead, we'll leverage powerful hosted APIs.
* Google Cloud Speech-to-Text: This robust cloud service allows you to send audio via REST or gRPC. It offers synchronous recognition for short audio clips (typically up to ~1 minute) and asynchronous recognition for longer files (up to 480 minutes). Crucially, it also supports streaming recognition for real-time transcription, returning interim results as the user speaks source. Google Cloud Speech-to-Text supports over 125 languages and variants.
* OpenAI Audio API (Whisper-based): Built on the highly capable Whisper model, OpenAI's Audio API provides excellent transcription services. You can upload an audio file (in formats like MP3, WAV, WebM) or stream audio and receive highly accurate transcriptions. Models such as whisper-1 or the more advanced gpt-4o-transcribe offer multilingual support and exceptional performance source.
For a beginner AI speech recognition tutorial, the practical approach involves:
* Using a Python microphone library (e.g., PyAudio or sounddevice) to capture audio from your microphone.
* Sending these short audio clips to your chosen Speech-to-Text API.
* Receiving the transcribed text back from the API.
This setup greatly simplifies the complexity, allowing you to focus on the subsequent steps of your AI voice assistant programming.
Natural Language Processing (NLP for Voice Assistants)
Once speech is converted to text, the assistant needs to understand what was said. This is where Natural Language Processing (NLP) for voice assistants comes in. NLP is a set of techniques and algorithms that transform raw text transcriptions into structured data like intents and entities, enabling the assistant to decide on the appropriate action.
The primary tasks within NLP for voice assistants include:
* Intent Classification: This maps the user’s utterance to a predefined discrete action or purpose. For example, "what's the weather like?" would be classified as a GETWEATHER intent, or "play some music" as a PLAYMUSIC intent.
* Entity/Slot Extraction: After identifying the intent, this task involves picking out specific pieces of information (entities or "slots") from the utterance that are necessary to fulfill the intent. In "set an alarm for 7 am tomorrow," "7 am" is a time entity, and "tomorrow" is a date entity.
Approaches to NLP range from simple rule-based systems to advanced deep learning models:
* Rule-Based: This is the simplest approach, using keyword matching (e.g., if the text contains "time," trigger the GET_TIME intent). While easy to implement, it can be brittle and struggle with variations in phrasing.
* Machine Learning (ML): More sophisticated systems use ML models trained on labeled data to classify intents and extract entities.
* Large Language Models (LLMs): Modern LLM APIs can be incredibly powerful for NLP for voice assistants. They can interpret complex utterances and extract nuanced information with high accuracy, often requiring less explicit training data for simple tasks.
For this tutorial, we recommend a hybrid approach. Start with keyword-based matching for your initial intents. As your assistant grows, you can explore using an LLM or a more dedicated NLP API for more complex intent classification, improving the assistant's understanding and flexibility. According to Gartner, by 2025, 75% of customer service organizations will use conversational AI, demonstrating the pervasive impact of advanced NLP techniques in real-world applications.
Core Logic and AI Voice Assistant Programming
The core logic is where the pieces connect. This segment of AI voice assistant programming is your custom code that takes the output from speech recognition and NLP (the recognized intent and extracted entities) and executes a specific action. It's the decision-making engine of your assistant.
A typical programming structure revolves around a continuous loop:
- Listen: The assistant waits for your command.
- Transcribe: Your speech is converted to text via the ASR service.
- Interpret: The NLP module identifies your intent and any entities.
- Choose Intent: The core logic determines which action corresponds to the identified intent.
- Call Handler Function: A specific function designed to perform that action is invoked.
- Generate Textual Response: The handler function prepares a text-based reply.
- Speak Response: The TTS service converts this text into spoken audio.
- Loop: The assistant returns to a listening state, ready for the next command.
Examples of handler functions you might implement include:
* handlegettime(): Retrieves the current system time and formats it into a spoken sentence.
* handleopenapp(app_name): Uses an operating system command to launch applications like a web browser or a text editor.
* handlesearchweb(query): Sends the query to a search engine API and potentially summarizes the results.
This centralized loop and the associated handler functions are where you'll spend significant time in your AI voice assistant programming, ensuring your assistant responds appropriately to various commands. Proper error handling, such as responding with "Sorry, I didn't catch that," when intents are unclear, is also a critical part of this stage.
Text-to-Speech (TTS)
The final piece of the puzzle is Text-to-Speech (TTS). TTS is the technology that converts digital text into audible synthetic speech. This allows your AI voice assistant to "talk back" to you, closing the loop of the voice interaction.
There are several options for implementing TTS:
* Cloud-based TTS Services: Major cloud providers like Google Cloud Text-to-Speech, Amazon Polly, and Azure TTS offer highly natural-sounding voices, often employing advanced neural networks. These services typically provide a wide range of languages, accents, and voice customization options.
* Local Open-Source Engines/Libraries: For scenarios requiring offline capabilities or minimal latency, local TTS engines (like eSpeak or Festival) or Python libraries that interface with operating system-native voices can be used.
The integration generally involves defining a function that sends the assistant's textual response to your chosen TTS service or engine. The service then generates an audio file or stream, which your program plays through the computer's speakers. Latency can be a consideration with cloud-based TTS, as network delays can introduce a slight pause before the assistant speaks. However, the quality of cloud voices often outweighs this minor drawback for many applications.
Planning Your Project (Scope, Tools, and Environment)
A well-defined plan is crucial before you dive into coding. This step-by-step AI assistant guide aims for a practical, beginner-friendly outcome. We will build a simple, command-based AI voice assistant that runs locally on your computer. It will use a push-to-talk mechanism and support a few fundamental intents like telling the time, providing weather updates, opening applications, or performing basic web searches.
Choice of Language and Runtime:
Python is the recommended programming language for this project due to its extensive ecosystem and rich libraries relevant to audio processing, HTTP requests, and machine learning. This makes it ideal for leveraging the best tools for AI voice assistant development. While JavaScript/Node.js is an alternative, Python's accessible libraries make it a strong choice for beginners tackling AI voice assistant programming.
Core External Services (APIs):
* Speech-to-Text: We will rely on either Google Cloud Speech-to-Text or OpenAI Audio (Whisper) API for converting your speech to text. These cloud services offer high accuracy without the need to train complex models yourself.
* NLP: For simplicity, we'll start with rule-based intent detection. For more complex scenarios, you could integrate an LLM API.
* Text-to-Speech: Any cross-platform TTS service or OS-native TTS will be suitable for generating audible responses.
Step 1 – Set Up the Development Environment
The first concrete step in learning how to build an AI voice assistant is preparing your development environment. A properly configured setup ensures you can follow the rest of this tutorial smoothly and focus on the AI voice assistant programming itself.
1. Install Python 3.x:
Most systems come with Python pre-installed, but it might be an older version. Ensure you have Python 3.8 or newer. You can download the latest version from the official Python website. Verify your installation by opening a terminal or command prompt and typing:
```bash
python --version
```
or
```bash
python3 --version
```
2. Install a Code Editor:
A good code editor will significantly improve your coding experience. Popular choices include:
* VS Code: Free, powerful, and highly customizable.
* PyCharm Community Edition: Excellent for Python development.
3. Install Git (Optional but Recommended):
Git is a version control system that helps track changes to your code. While optional for this tutorial, it's a fundamental skill for any developer. You can download it from git-scm.com.
4. Essential Python Packages:
You'll need several libraries. Use pip, Python's package installer, to install them:
* Audio Capture:
```bash
pip install pyaudio # Or pip install sounddevice
```
Note: pyaudio may require platform-specific dependencies.
* HTTP Requests:
```bash
pip install requests
```
* Client Libraries for Chosen APIs:
* Google Cloud Speech-to-Text:
```bash
pip install google-cloud-speech
```
Refer to the official documentation for setup: Google Cloud Speech-to-Text Docs
* OpenAI Audio API:
```bash
pip install openai
```
Refer to the official documentation for setup: OpenAI Speech-to-Text Docs
5. API Keys and Configuration:
Cloud services require API keys for authentication. This is a critical step in setting up the best tools for AI voice assistant development.
* Google Cloud: Create a Google Cloud Project, enable the Speech-to-Text API, and generate service account credentials. Download the JSON key file and set the GOOGLEAPPLICATIONCREDENTIALS environment variable to its path.
* OpenAI: Register for an account and generate an API key from your dashboard. Store this key securely, ideally as an environment variable (e.g., OPENAIAPIKEY). Never hardcode API keys directly into your code.
This foundational setup completes the first phase of your step-by-step AI assistant guide, preparing your workstation for the coding ahead.
Step 2 – Capturing and Sending Audio (Start of AI Speech Recognition Tutorial)
Bringing your AI voice assistant to life begins with its ability to hear you. This section details how to capture microphone input and prepare it for transcription, representing the core of our AI speech recognition tutorial. This is a fundamental step in understanding how to build an AI voice assistant.
Audio Capture Basics:
A microphone converts sound waves into electrical signals. These signals are then sampled at a specific rate (e.g., 16 kHz, meaning 16,000 samples per second) and bit depth (e.g., 16 bits per sample). For optimal accuracy with most speech-to-text APIs, recording audio at 16 kHz is recommended, though many APIs can adapt to other rates. When sending audio to APIs, you typically buffer it into manageable chunks, usually a few seconds long.
Practical Workflow (Push-to-Talk):
For our beginner-friendly assistant, we'll implement a push-to-talk mechanism. This avoids the complexity of continuous listening (wake-word detection) and is perfectly suitable for a simple prototype.
- Trigger Listening: The assistant will wait for a specific user action, such as pressing the
Enterkey. - Record Audio: Once triggered, the program will record audio from your microphone for a predefined duration (e.g., 5-10 seconds) or until it detects a period of silence.
- Buffer and Prepare: The captured audio will be stored in a temporary buffer. For most API calls, this audio needs to be saved as a WAV file or similar format.
- Send to API: The recorded audio file is then sent to your chosen Speech-to-Text API (e.g., Google Cloud Speech-to-Text or OpenAI Audio API).
- Receive Transcription: The API processes the audio and returns the transcribed text.
- Debug Output: For initial testing, you'll print this transcription to your console to verify that the speech recognition is working correctly.
Example (Conceptual pyaudio usage):
```python
import pyaudio
import wave
Configuration for audio capture
CHUNK = 1024
FORMAT = pyaudio.paInt16
CHANNELS = 1
RATE = 16000 # Recommended sample rate for speech
RECORD_SECONDS = 5 # Record for 5 seconds
Initialize PyAudio
p = pyaudio.PyAudio()
def recordaudioto_file(filename="output.wav"):
stream = p.open(format=FORMAT,
channels=CHANNELS,
rate=RATE,
input=True,
framesperbuffer=CHUNK)
print("--- Press Enter to speak, then wait for recording to finish ---")
input() # Wait for Enter key
print("Listening...")
frames = []
for i in range(0, int(RATE / CHUNK * RECORD_SECONDS)):
data = stream.read(CHUNK)
frames.append(data)
print("Finished recording.")
stream.stop_stream()
stream.close()
wf = wave.open(filename, 'wb')
wf.setnchannels(CHANNELS)
wf.setsampwidth(p.getsamplesize(FORMAT))
wf.setframerate(RATE)
wf.writeframes(b''.join(frames))
wf.close()
return filename
Don't terminate PyAudio yet, it might be used later.
p.terminate()
```
This step lays the groundwork for the assistant's ability to process verbal commands, a fundamental block in any AI speech recognition tutorial.
Step 3 – Implement Basic Speech-to-Text via an API
Having captured audio, the next crucial step is to convert that raw sound data into interpretable text. This moves us further into the practical realm of our AI speech recognition tutorial, allowing your assistant to understand spoken words by integrating powerful cloud APIs. This is a key part of how to build an AI voice assistant.
Using Google Cloud Speech-to-Text
Google Cloud Speech-to-Text is a leading service offering advanced, highly accurate transcription.
* Request Structure: To use it, you create a RecognitionConfig object specifying parameters like languageCode (e.g., "en-US"), sampleRateHertz (16000 for optimal performance), and encoding (e.g., LINEAR16).
* Synchronous Recognition: For the short utterances typical of voice commands, synchronous recognition is ideal. You send the audio data directly to the API.
* Response: The API returns a SpeechRecognitionResult object, which contains one or more transcription alternatives along with a confidence score. You'll typically take the first alternative as the most probable transcription.
* Features: Google Cloud Speech-to-Text supports over 125 languages, offers automatic punctuation, and can even differentiate between multiple speakers (diarization), which was used in over 1.7 million hours of audio transcription in 2022 source.
```python
Conceptual Python code for Google Cloud Speech-to-Text
from google.cloud import speech
def transcribeaudiogcp(audiofilepath):
client = speech.SpeechClient()
with open(audiofilepath, "rb") as audio_file:
content = audio_file.read()
audio = speech.RecognitionAudio(content=content)
config = speech.RecognitionConfig(
encoding=speech.RecognitionConfig.AudioEncoding.LINEAR16,
sampleratehertz=16000,
language_code="en-US",
)
response = client.recognize(config=config, audio=audio)
for result in response.results:
if result.alternatives:
return result.alternatives[0].transcript
return ""
```
Using OpenAI Audio API (Whisper)
The OpenAI Audio API, powered by the Whisper model, offers another excellent option for high-quality transcription.
* Transcription Endpoint: You interact with the /v1/audio/transcriptions endpoint.
* Audio Upload: You upload an audio file (e.g., .wav, .mp3) along with the desired model (e.g., whisper-1 or gpt-4o-transcribe). The gpt-4o-transcribe model provides improved accuracy and can handle more complex scenarios.
* Response Formats: The API can return the transcription in various formats, including JSON and plain text.
* Prompting: A unique feature is the prompt parameter, which allows you to provide context or specific words to bias the transcription, improving accuracy for domain-specific vocabulary source.
```python
Conceptual Python code for OpenAI Audio API
from openai import OpenAI
def transcribeaudioopenai(audiofilepath):
client = OpenAI()
with open(audiofilepath, "rb") as audio_file:
transcript = client.audio.transcriptions.create(
model="whisper-1", # or "gpt-4o-transcribe" for newer models
file=audio_file,
response_format="text"
)
return transcript
```
After implementing this step, your assistant can convert captured audio into textual commands. This capability forms the core of the AI speech recognition tutorial component and provides the textual input needed for the next stage of AI voice assistant programming. These services represent some of the best tools for AI voice assistant development for speech-to-text.
Step 4 – Designing Intents and NLP for Voice Assistants
With raw text transcriptions in hand, the next challenge is to make sense of them. This section focuses on transforming those transcriptions into structured intents and entities, which is the very essence of NLP for voice assistants. This allows your assistant to move beyond simply hearing words to actually understanding meaning.
Defining Your Intent Schema
The first step in NLP for voice assistants is to define a set of intents your assistant will support. An intent represents a specific goal or action the user wants to achieve. For each intent, you also identify the necessary pieces of information (entities or slots) to fulfill that intent.
Here’s an example schema for a simple assistant:
* Intent: GET_TIME
* Example utterances: "What time is it?", "Tell me the current time", "Time now."
* Entities: None (implicitly gets local time).
* Intent: OPEN_APP
* Example utterances: "Open Chrome", "Launch Notepad", "Start browser."
* Entities: app_name (e.g., "Chrome", "Notepad", "browser").
* Intent: SEARCH_WEB
* Example utterances: "Search for Python tutorials", "Find pictures of cats", "Google VocalLabs.AI."
* Entities: query (e.g., "Python tutorials", "pictures of cats", "VocalLabs.AI").
* Intent: GET_WEATHER
* Example utterances: "What's the weather in London?", "Temperature in Paris."
* Entities: location (e.g., "London", "Paris").
* Intent: GREETING
* Example utterances: "Hello", "Hi assistant", "Good morning."
* Entities: None.
* Intent: GOODBYE
* Example utterances: "Goodbye", "See you later", "Exit."
* Entities: None.
Implementing Rule-Based Parsing
For a beginner's prototype on how to build an AI voice assistant, a rule-based approach for intent and entity extraction is often the most straightforward:
- Lowercase Transcription: Convert the incoming text to lowercase to ensure consistent matching (e.g., "Open" vs. "open").
- Keyword Matching for Intents:
* If the text contains "time", "date", or "hour", it’s likely GET_TIME.
* If words like "open", "launch", or "start" are present, it suggests an OPEN_APP intent.
* If phrases like "search for", "find", or "google" appear, it points towards SEARCH_WEB.
- Basic Entity Extraction:
* SEARCHWEB: If the intent is SEARCHWEB and the utterance starts with "search for", extract everything that follows as the query entity.
* OPEN_APP: Check for known application names after "open" or "launch".
* GET_WEATHER: Look for location names following prepositions like "in" or "for".
This method is precise and completely under your control, making it excellent for understanding the mechanics of NLP for voice assistants without complex machine learning models.
Optional ML/LLM-Based NLP
For more advanced NLP for voice assistants, especially as your assistant supports more commands, you might consider:
* Training an Intent Classifier: Using natural language libraries like spaCy or NLTK, you can develop machine learning models to classify intents with greater robustness against varied phrasing. Services like VocalLabs.AI leverage such advanced models to deliver highly reliable conversational experiences.
* Leveraging LLM APIs: You can send the transcribed text to a large language model API (e.g., OpenAI's GPT models) with a specific prompt asking it to identify the intent and extract entities, often returning them in a structured JSON format. This offers tremendous flexibility but requires careful prompt engineering.
While rules are great for starters, moving to ML or LLMs provides greater flexibility and scalability for your AI voice assistant programming. For instance, a recent study showed that LLMs could achieve over 90% accuracy in intent classification with zero-shot learning on several benchmark datasets.
Step 5 – Core AI Voice Assistant Programming (Connecting Everything)
This is where the magic happens and your AI voice assistant programming comes to life. In this section, we'll outline the main loop that ties together audio capture, speech-to-text, NLP, and action execution. This central piece demonstrates how to make your assistant functional within this step-by-step AI assistant guide.
Main Loop Logic (Pseudocode)
The assistant operates within a continuous cycle, waiting for input, processing it, and responding. Here’s a conceptual flow:
```python
while True:
print("Press Enter to speak your command, or type 'quit' to exit.")
user_input = input()
if user_input.lower() == 'quit':
break
1. Capture Audio
audiofilepath = recordaudioto_file() # Function from Step 2
2. Transcribe Audio
Assuming transcribe_audio_openai from Step 3
transcribedtext = transcribeaudioopenai(audiofile_path)
print(f"You said: {transcribed_text}")
if not transcribed_text:
response_text = "Sorry, I didn't hear anything. Please try again."
speak(response_text) # Function from Step 6
continue
3. Interpret Intent and Entities (NLP from Step 4)
intent, entities = analyzetextforintent(transcribedtext) # Custom NLP function
4. Dispatch to Handler Function
response_text = ""
if intent == "GET_TIME":
responsetext = handleget_time()
elif intent == "OPEN_APP":
appname = entities.get("appname")
responsetext = handleopenapp(appname) if app_name else "Which application would you like to open?"
elif intent == "SEARCH_WEB":
query = entities.get("query")
responsetext = handlesearch_web(query) if query else "What would you like me to search for?"
elif intent == "GREETING":
response_text = "Hello there! How can I help you?"
elif intent == "GOODBYE":
response_text = "Goodbye! Hope to talk to you soon."
speak(response_text)
break # Exit the loop after saying goodbye
else:
response_text = "I'm sorry, I didn't understand that command."
5. Generate and Speak Response (using function from Step 6)
speak(response_text)
```
Designing Handler Functions
Each intent needs a corresponding function to execute the required action. Here are examples:
* handlegettime():
```python
import datetime
def handlegettime():
now = datetime.datetime.now()
return f"The current time is {now.strftime('%I:%M %p')}."
```
* handleopenapp(app_name):
```python
import subprocess
import platform
def handleopenapp(app_name):
app_map = {
"browser": "google chrome" if platform.system() == "Windows" else "open -a 'Google Chrome'",
"notepad": "notepad.exe" if platform.system() == "Windows" else "TextEdit",
Add more app mappings as needed
}
command = appmap.get(appname.lower())
if command:
try:
subprocess.Popen(command, shell=True)
return f"Opening {app_name}."
except Exception as e:
return f"Sorry, I couldn't open {app_name}. Error: {e}"
else:
return f"I don't know how to open {app_name}."
```
* handlesearchweb(query):
```python
import webbrowser
def handlesearchweb(query):
search_url = f"https://www.google.com/search?q={query.replace(' ', '+')}"
webbrowser.open(search_url)
return f"Searching the web for {query}."
```
Error Handling
Robust AI voice assistant programming includes handling situations where the assistant can't understand or execute a command. If speech recognition provides low confidence (if supported by your API, like Google STT's confidence score), or if NLP returns an UNKNOWN intent, the assistant should provide a polite fallback response, such as "Could you please repeat that?" or "I didn't quite catch that." This improves the user experience significantly. This detailed approach to the main loop and handlers brings together everything you've learned on how to build an AI voice assistant.
Step 6 – Adding Voice Output with TTS
To complete the conversational loop in your "how to build an AI voice assistant" project, the assistant needs to speak its responses aloud. This step focuses on integrating Text-to-Speech (TTS) capabilities, providing your digital companion with a voice. This is a critical element, enabling truly interactive AI voice assistant programming.
TTS Selection
When choosing a TTS solution, you generally have two main practical choices:
* Cloud TTS Services: These are typically the most advanced, offering highly natural and human-like voices generated by deep learning models. Examples include:
* Google Cloud Text-to-Speech: Known for its WaveNet and Standard voices, offering a wide range of languages, accents, and emotional tones.
* Amazon Polly: Provides high-quality, natural-sounding voices, including neural text-to-speech (NTTS) voices.
* Microsoft Azure Text-to-Speech: Features highly expressive and customizable neural voices.
* OS-Native TTS: Many operating systems include built-in TTS engines (e.g., macOS's say command, Windows' SAPI). These are often simpler to integrate and provide very low latency because they run locally, making them a practical choice for initial prototypes or when internet connectivity is a concern. The pyttsx3 library in Python can interface with these native engines.
Integrating TTS
Integrating TTS usually involves creating a dedicated function that takes the assistant's textual response and sends it to the chosen TTS engine or API.
```python
Conceptual Python code for TTS (using gTTS for simplicity, or pyttsx3 for native)
Using gTTS (Google Text-to-Speech) - requires internet and saves file temporarily
pip install gtts playsound
from gtts import gTTS
from playsound import playsound
import os
def speak(text):
if text:
try:
tts = gTTS(text=text, lang='en')
filename = "response.mp3"
tts.save(filename)
playsound(filename)
os.remove(filename) # Clean up the audio file
except Exception as e:
print(f"Error playing TTS: {e}")
Fallback to print if TTS fails
print(f"Assistant (TTS failed): {text}")
Alternative using pyttsx3 (OS-native TTS) - often less natural but offline capable
pip install pyttsx3
"""
import pyttsx3
engine = pyttsx3.init()
You can set properties like rate, volume, and voice here
engine.setProperty('rate', 150) # Speed of speech
voices = engine.getProperty('voices')
engine.setProperty('voice', voices[1].id) # Change index for different voices
def speak_native(text):
engine.say(text)
engine.runAndWait()
Replace `speak` in main loop with `speak_native` if using this
"""
```
Latency Considerations
While cloud-based TTS services offer superior voice quality, they introduce network latency. This means there might be a fractional delay between the assistant generating a response and actually speaking it. For a smoother experience, keep responses concise. For applications demanding ultra-low latency, OS-native TTS or streaming TTS options (if provided by the cloud service) might be preferable. Making these choices is part of selecting the best tools for AI voice assistant development that fit your project's needs.
Step 7 – Testing, Debugging, and Iterating
Building an AI voice assistant is an iterative process. Once you have a working prototype, thorough testing, debugging, and continuous refinement are essential to improve its reliability and user experience. This final technical step in our step-by-step AI assistant guide will ensure your assistant functions as intended.
Testing Strategy
Test your assistant in layers:
* Module-level Testing:
* Speech Recognition: Speak various commands, including those with background noise or slight mispronunciations, and verify the accuracy of the transcribed text printed to the console.
* NLP: Provide sample transcribed texts (not spoken audio) directly to your analyzetextfor_intent function and check if the correct intent and entities are detected.
* Core Logic (Handlers): Call your handler functions (e.g., handlegettime(), handleopenapp("browser")) directly with programmed inputs to ensure they execute correctly and return appropriate textual responses.
* TTS: Test your speak function with different text inputs to confirm it generates and plays audio appropriately.
* End-to-End Flow: Interact with the full assistant, speaking commands naturally, and observe if the entire pipeline—from listening to speaking—works seamlessly.
Common Issues & Fixes
* Misrecognized Words:
* Environment: Ensure you're in a quiet environment and using a good quality microphone. Background noise significantly degrades ASR performance.
* Sample Rate: Confirm your audio is being captured at the recommended sample rate (e.g., 16 kHz) for your chosen API.
* API Prompts: If using the OpenAI Audio API, consider using the prompt parameter to give the model context or specific vocabulary, especially for uncommon words or names source.
* Latency:
* Audio Length: For short commands, try to keep your recorded audio segments brief (e.g., 3-5 seconds max) to reduce upload time.
* Streaming: For more advanced, real-time applications, investigate streaming recognition options offered by services like Google Cloud Speech-to-Text.
* Local vs. Cloud: If TTS latency is an issue, consider switching from a cloud TTS service to an OS-native TTS engine, which eliminates network round-trips.
* Incorrect Intents or Entity Extraction:
* Refine Rules: If using rule-based NLP, add more keywords, synonyms, or specific pattern matches to your analyzetextfor_intent function.
* Ambiguity: For ambiguous phrases, consider returning a clarifying question to the user (e.g., "Did you mean opening the browser or a different application?").
* LLM Fallback: For sophisticated NLP for voice assistants, an LLM could act as a fallback, attempting to interpret commands that your rule-based system fails to understand.
* API Errors: Ensure your API keys are correctly configured and have the necessary permissions. Always handle potential network issues or rate limits gracefully.
Logging and Observability
Implement logging throughout your application. This is invaluable for debugging and understanding your assistant's behavior. Log:
* The raw transcribed text.
* The detected intent and extracted entities.
* Any error messages from APIs or your custom logic.
* The textual response generated before TTS.
By reviewing these logs, you can diagnose why the assistant might have misunderstood a command or failed to execute an action, leading to effective improvements. This iterative process is how you truly master AI voice assistant programming and refine your project.
Essential Toolkit – Best Tools for AI Voice Assistant Development
Developing an AI voice assistant relies heavily on choosing the right tools. Here is a curated list of some of the best tools for AI voice assistant development, categorized by their function, along with brief explanations and relevant resources.
Speech Recognition (ASR) Tools
These services convert spoken audio into text, forming the foundation of any voice assistant.
* Google Cloud Speech-to-Text:
* Capabilities: Offers synchronous, asynchronous, and streaming recognition. Supports over 125 languages and variants, provides confidence scores, and features like automatic punctuation and speaker diarization.
* Use Case: Ideal for highly accurate, flexible transcription in various scenarios, from short commands to long-form audio.
* Resource: Google Cloud Speech-to-Text Docs
* OpenAI Audio API (Whisper-based):
* Capabilities: Provides high-quality transcriptions and translations using powerful Whisper models (e.g., whisper-1, gpt-4o-transcribe). Supports a wide range of audio formats and accepts a prompt for contextual biasing.
* Use Case: Excellent for highly accurate, multilingual transcription and scenarios where contextual hints can improve recognition. Newer models like gpt-4o-transcribe-diarize also offer speaker differentiation.
* Resource: OpenAI Speech-to-Text Docs
Natural Language Processing (NLP) Tools
These tools help your assistant understand the meaning and intent behind the transcribed text.
* General-purpose NLP Libraries (Python):
* spaCy: A powerful and efficient library for advanced NLP tasks like tokenization, named entity recognition (NER), dependency parsing, and custom text classification.
* NLTK (Natural Language Toolkit): A more feature-rich library suitable for research and prototyping, offering tokenizers, stemmers, taggers, parsers, and machine learning classifiers.
* Use Case: Building custom rule-based parsers or training simple intent classifiers for NLP for voice assistants.
* LLM APIs (e.g., OpenAI GPT, Anthropic Claude):
* Capabilities: Can perform sophisticated intent detection and entity extraction through prompt engineering, often requiring less explicit training data than traditional ML models.
* Use Case: For more complex, nuanced understanding of user queries, expanding beyond simple keyword matching.
Programming and Glue Code Tools
Python's ecosystem provides fundamental components for connecting everything.
* pyaudio or sounddevice: Python libraries for cross-platform audio input/output, essential for capturing microphone audio and playing back TTS.
* requests or httpx: Libraries for making HTTP requests to interact with cloud APIs.
* subprocess module: For interacting with the operating system, such as launching applications or running system commands.
* webbrowser module: To open web pages directly from your assistant.
Text-to-Speech (TTS) Tools
These tools give your assistant a voice to respond to users.
* Google Cloud Text-to-Speech:
* Capabilities: Offers high-quality, natural-sounding voices, including WaveNet voices with human-like prosody. Supports numerous languages and voices.
* Use Case: When high-fidelity, expressive speech output is a priority.
* pyttsx3:
* Capabilities: A Python library that provides an interface to OS-native text-to-speech engines (SAPI for Windows, NSSpeechSynthesizer for macOS, eSpeak for Linux). Works offline.
* Use Case: For basic, offline TTS where extremely natural voices are not the primary concern, or for rapid prototyping due to ease of setup and low latency.
* Amazon Polly, Microsoft Azure Text-to-Speech:
* Capabilities: Similar to Google Cloud TTS, these offer high-quality neural voices with a range of customization options.
* Use Case: Cloud-agnostic voice synthesis or leveraging existing cloud provider relationships.
Selecting the appropriate tools from this list will significantly streamline your AI voice assistant programming and allow you to focus on the unique aspects of your assistant's functionality.
Beyond Basics – Enhancements and Next Steps
Once you've mastered the fundamentals of how to build an AI voice assistant, a world of advanced features awaits. Taking your assistant beyond basic command-response models involves adding sophistication to its listening, understanding, and interaction capabilities.
Wake-Word Detection
For a truly hands-free experience, wake-word detection allows your assistant to continuously listen for a specific trigger phrase (e.g., "Hey Assistant"). When the wake-word is detected, the full speech recognition and NLP pipeline activates. Implementing this typically involves using lightweight keyword-spotting models (like those from Picovoice's Porcupine, or CMU Sphinx) that run continuously with minimal computational resources. This enhances the user experience by mimicking commercial voice assistants.
Multi-Turn Conversation
Basic assistants handle single commands. A more advanced assistant can maintain context across multiple turns of a conversation. This requires:
* Dialogue State Management: Storing previous intents, entities, and confirmed information. For example, if a user asks "What's the weather in Paris?" and then "And in Berlin?", the assistant remembers the GET_WEATHER intent and applies it to "Berlin."
* Contextual Understanding: Using prior utterances to interpret subsequent ones. This is a significant step in improving NLP for voice assistants.
Personalization
Making the assistant feel more tailored involves personalization. This includes:
* User Preferences: Storing and recalling user-specific settings, such as preferred units (Celsius vs. Fahrenheit), favorite news sources, or frequently used locations.
* Adaptive Responses: Adjusting responses based on the user's history or known preferences.
Integrations
Connecting your assistant to external services dramatically expands its utility. Each integration effectively becomes a new intent and requires a dedicated handler:
* Calendar Management: "Add an event to my calendar."
* Email Communication: "Send an email to John."
* Smart Home Devices: "Turn off the lights in the living room."
* Messaging Apps: "Send a text to Mary."
These integrations require interacting with third-party APIs (e.g., Google Calendar API, Twilio API).
Learning and Continuous Improvement
The journey of AI voice assistant programming is ongoing. To make your assistant truly intelligent and robust:
* Log and Analyze: Continuously log anonymized user interactions. Periodically review these logs to identify common phrases that lead to misinterpretations or unrecognized intents.
* Refine Models: Use this data to refine your NLP rules, improve prompt engineering for LLMs, or even retrain machine learning models.
* User Feedback: Implement mechanisms for users to provide feedback on the assistant's performance.
By pursuing these enhancements, you'll find that mastering how to build an AI voice assistant is an iterative process of expanding its capabilities and user value.
Frequently Asked Questions
Q: What are the main components needed to build a voice assistant?
To build a voice assistant, you need four main components: Speech-to-Text (STT) to convert voice to text, Natural Language Processing (NLP) to understand intent, core logic to execute actions, and Text-to-Speech (TTS) to generate spoken responses. These components work in sequence to process voice commands and respond audibly.
Q: Which programming language is best for AI voice assistant development?
Python is widely considered one of the best programming languages for AI voice assistant development. It has an extensive ecosystem of libraries for audio processing (e.g., PyAudio), making HTTP requests (e.g., Requests), and machine learning (e.g., spaCy, NLTK, OpenAI SDK), simplifying the integration of various AI components.
Q: Can I build an AI voice assistant without extensive AI/ML knowledge?
Yes, you can build a basic AI voice assistant without deep AI/ML knowledge by leveraging powerful cloud APIs for Speech-to-Text (like Google Cloud Speech-to-Text or OpenAI Audio API) and Text-to-Speech. For Natural Language Processing, you can start with simple rule-based intent detection before exploring more complex ML or LLM-based solutions.
Q: How do AI voice assistants interpret my commands?
AI voice assistants interpret commands through Natural Language Processing (NLP). After converting your speech to text, NLP techniques identify your intent (what you want to do, like "get time") and extract any relevant entities (specific details, like "London" in "weather in London"). This structured information then guides the assistant's actions.
Q: What is the difference between "always-on" and "push-to-talk" assistants?
"Always-on" assistants, like Alexa or Siri, continuously listen for a specific wake-word before activating. "Push-to-talk" assistants, on the other hand, only listen for commands when manually triggered by a user action, such as pressing a button or key. Push-to-talk is simpler for beginners as it avoids the complexities of continuous listening and wake-word detection.
Q: Are there free tools or APIs for building a voice assistant?
Many powerful tools and APIs offer free tiers or generous free usage limits suitable for development and prototyping. Examples include the free tiers of Google Cloud Speech-to-Text and Text-to-Speech, the OpenAI Audio API with its usage-based pricing, and open-source Python libraries like pyttsx3 for OS-native Text-to-Speech.
Q: How can I improve my voice assistant's understanding and accuracy?
To improve understanding and accuracy, you should focus on robust testing and iteration. Refine your NLP rules or prompts, use higher-quality microphone equipment, ensure optimal audio recording conditions, and consider leveraging advanced features like contextual biasing (e.g., OpenAI's prompt parameter). Logging interactions and continuously analyzing misinterpretations will guide your improvements.